Tableau Story
What is a Tableau Story? Tableau Story is a feature that Tableau created that it’s honestly not used enough or correctly. You can replace PowerPoint and replace it with an interactive presentation in Tableau. When you create a Tableau Story, you have to keep in mind that you are still building a presentation just like you would be doing in PowerPoint. So all of those same principles apply. Each point in our story is going to be a slide. Each slide needs to be focused and very simple. We don’t want anything in our PowerPoint slide that is not meaningful, that is the same principle we will apply to our Tableau Stories. To accomplish this, we’re going to have to plan the story out to make sure it’s focused and stays on target. Learn how to really use the Tableau Story mode in this Tableau story tutorial.
Download Free Story Template:
Download the workbook and data I used to create the blog so you can use it as a template.
Plan your Tableau Story
The very first thing we need to do is think about what the goal of our presentation is going to be. Then we are going to plan out each slide. For example, the first story point will be the cover page, the next story point we will talk about our methods and an overview of the project, then next will be demographics, etc. This is meant to be a presentation, so you have to plan out each step, so it flows. Then after that, you are going to have to figure out what charts you need in each story point. Once you have your plan, you will start building your charts.
Create your Tableau Story Points
I created all my charts behind the scenes to make the blog go a little faster, but of course, you would have to create your charts first after you come up with your plan. After that we’re going to develop our story points, I create dashboards for my story points instead of using individual charts in my Tableau Story. The reason I do that is because there is more flexibility with dashboards and it’s a lot cleaner. So the plan is we create our charts, put them into a dashboard, format it how we like and then put those dashboards into our Tableau Story. So by the time we get to the story, your pretty much 90% done.
All right, so we got all of our different worksheets created, we have our plan, next thing we’re going to do is put these worksheets in the dashboards, which will be our different story points. The first thing that I like doing is creating a cover page. It’s a presentation, for me, I need a cover page.

Now I did a little extra work here; I had a graphic designer create a cover page for this presentation. You don’t have to get a graphic designer to do it; you can do it yourself in Photoshop or Snagit or, any other type of design application. All you need to do is create a beautiful image to put on the front of your story with the title of your presentation. Now when actually creating my dashboard, I personally go with a size of 1,000 by 780. I find that this size fits the best for the default story size. To get the image in there, all you have to do is add an image object to the dashboard and do the fit image and center option.
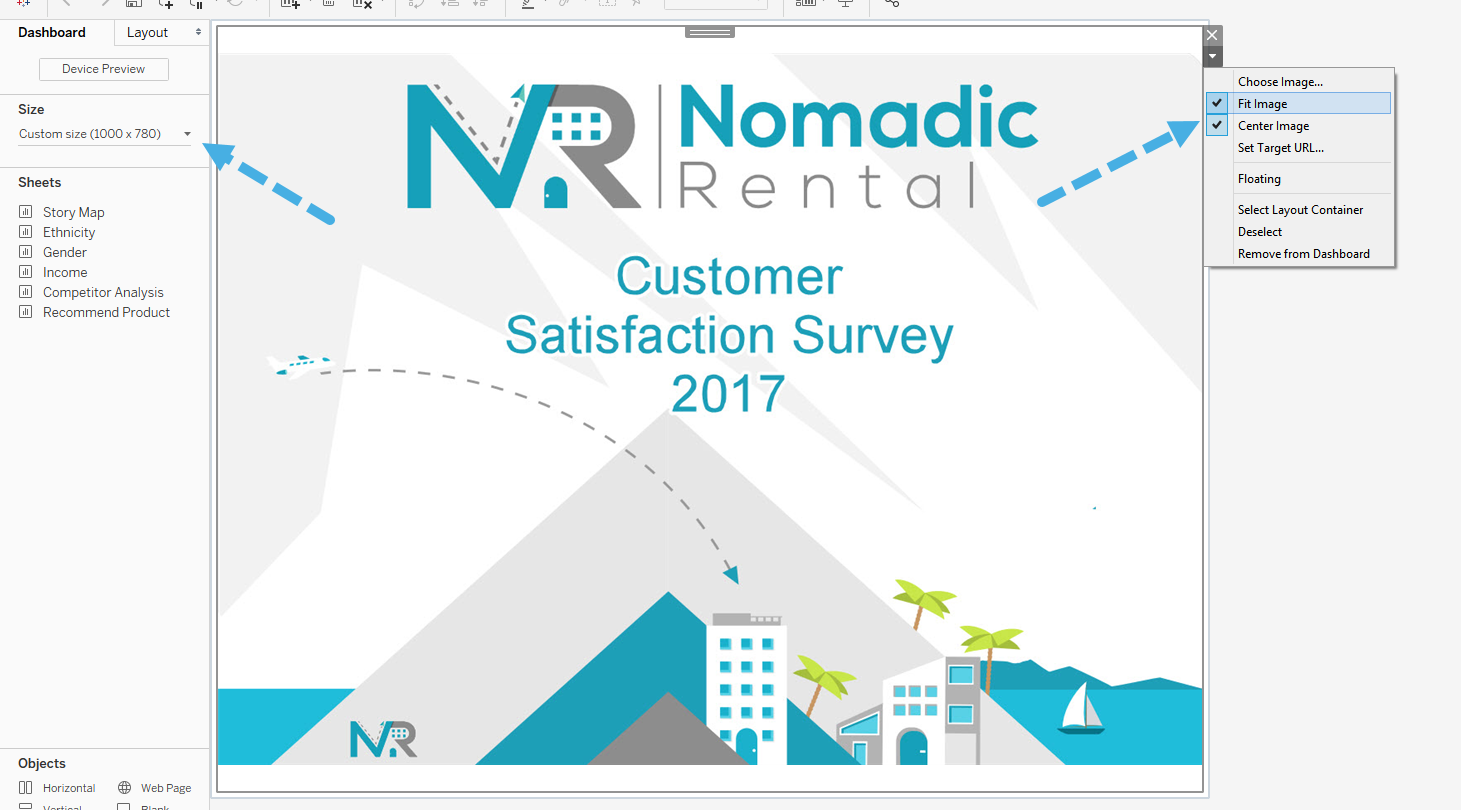
The next story point we are going to create is an overview slide. I will start by adding a new image on the left side. I am then going to put two text boxes to the right and paste in the text I have prepared for each section. This is now going to be my second story point now.

The next story point we’re going to make is for the demographic overview. I am going to duplicate this one and use it as a template. We’re going to style this one up just a little different; we are going to add a different picture on the left and charts on the right. I am also going to add another picture, which is a header that’s going to go up on the top. I’m going to select the fit image and resize it to my liking.
Next, I’m going to add a vertical container to the right of where my text will go and start stacking all my worksheets in the container. I am going to use a Current Customer filter on this dashboard so I can filter the data while I am presenting. Now clean it up some, move things around and change the fit.
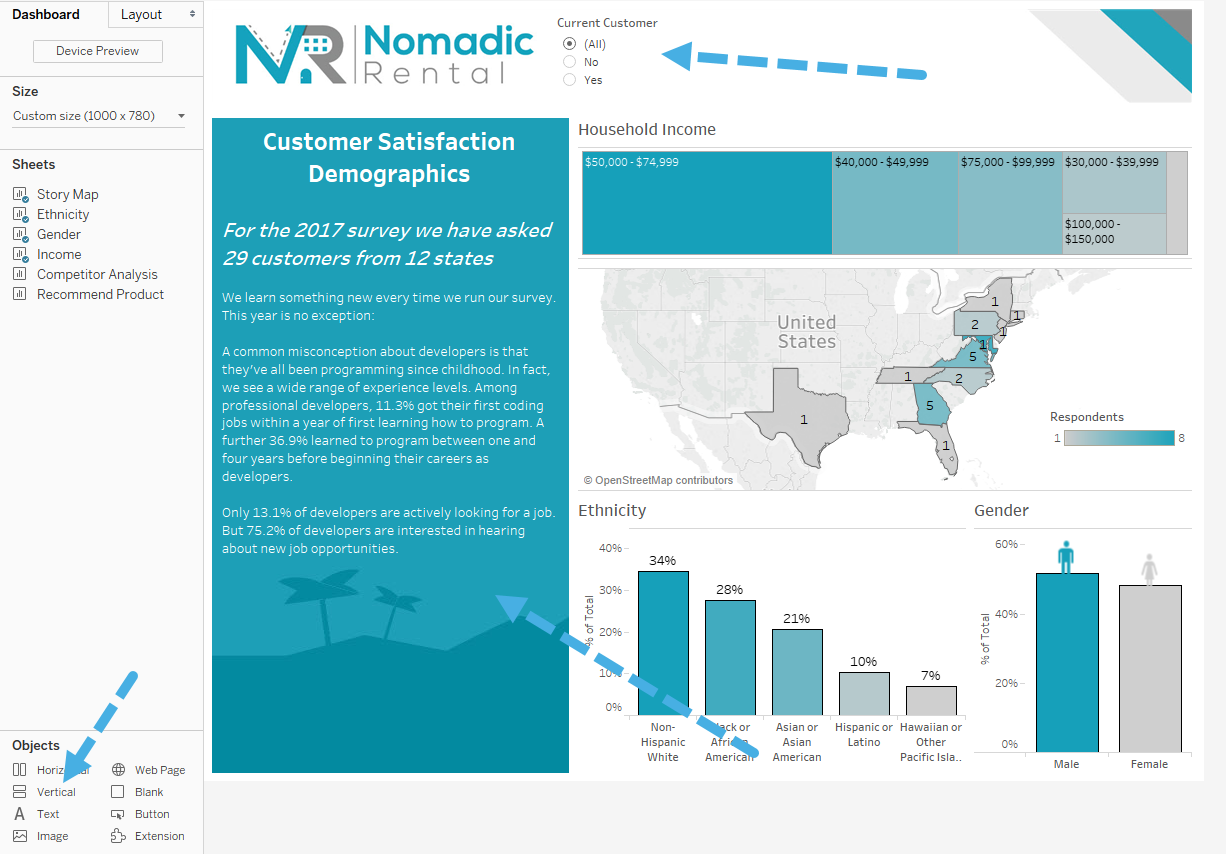
Now since we’re going to be presenting this, we need some texts. So what I do is grab a textbox object and float it on top of the image I put on the left side. I already got some text prepared so I just past it in the textbox and adjust the font and color.
Since we have most of the formatting done in this one, I am going to go ahead and duplicate this one as a template so I can use it for my next story point. For the next story point, all we have to do is switch out the old charts with the new ones and change the text. That is it! Then we can duplicate this one and create the rest of our dashboards.
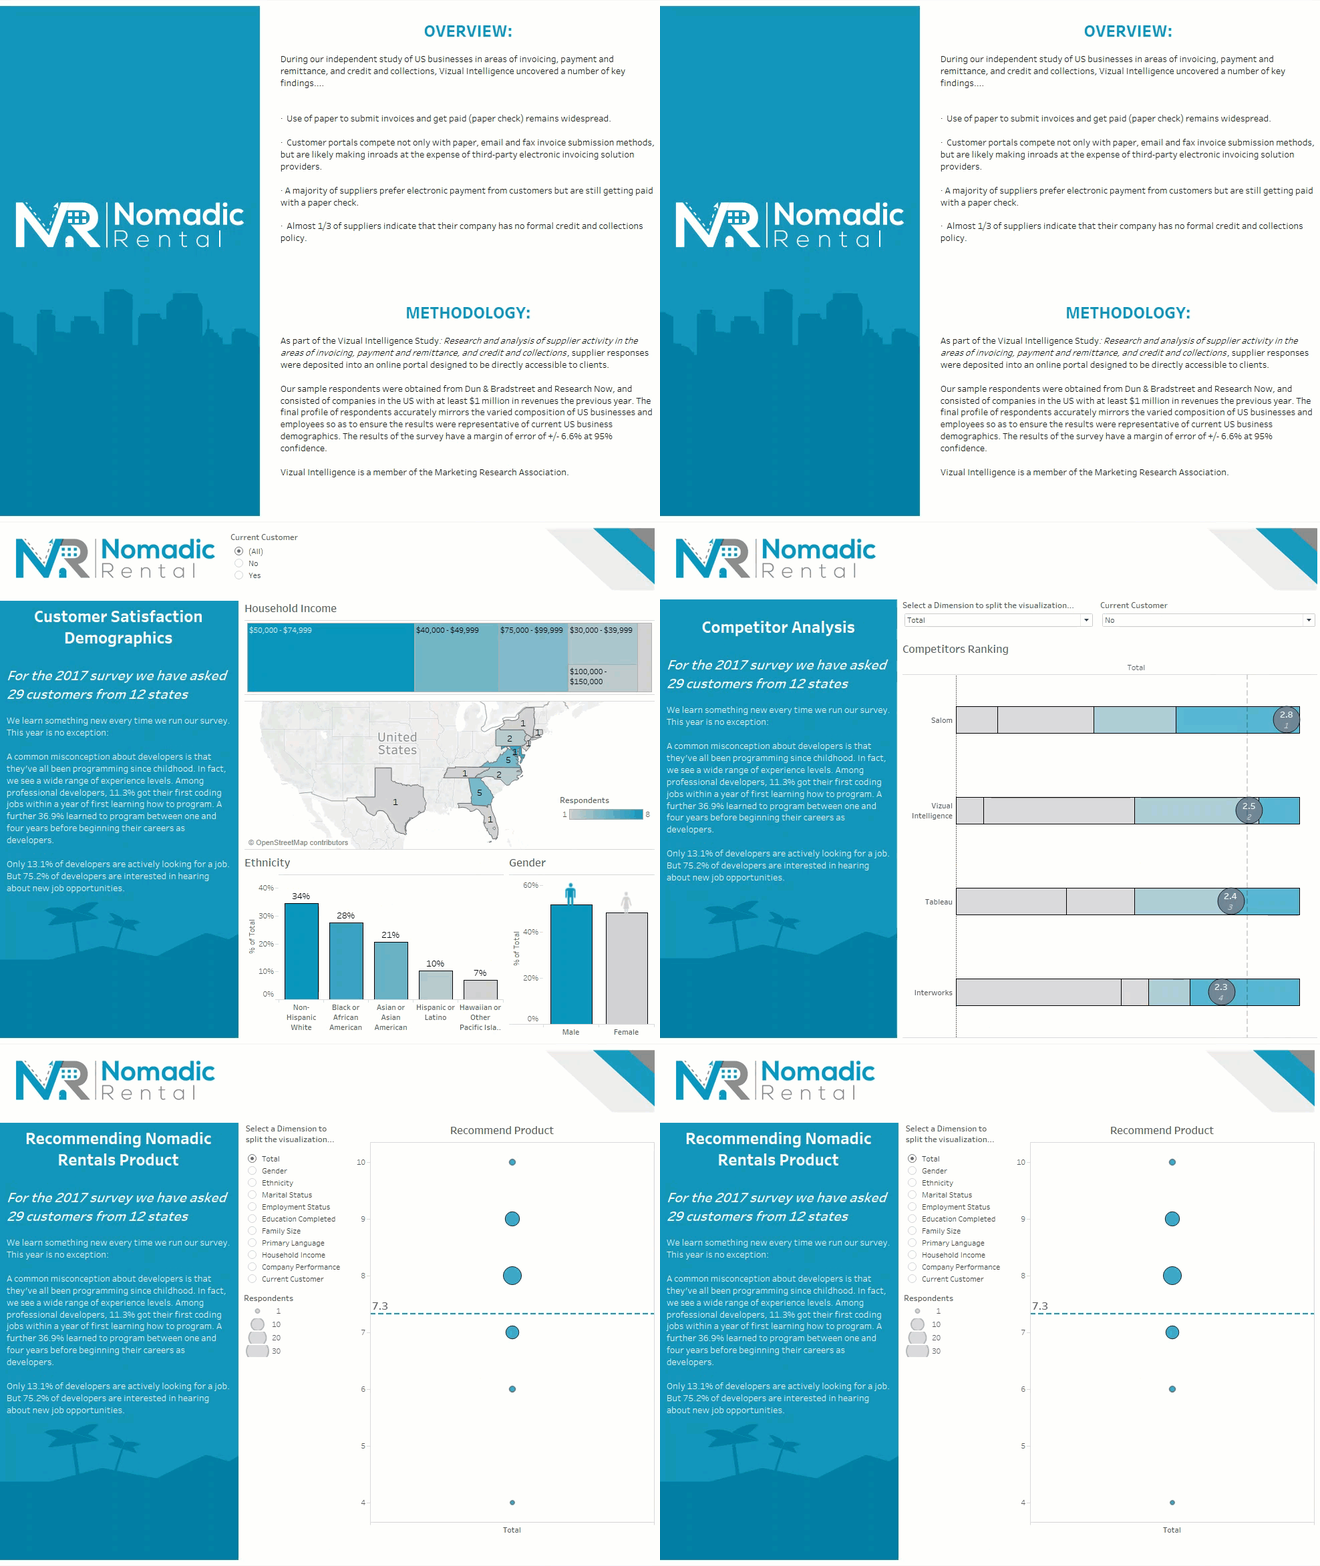
Tableau Story Creation
So after we get all of our dashboards created, it is now time to build our Tableau Story. Click the create new story button to get started. We have already done all the hard work in the previous steps; now it’s just dragging the dashboards into the story point. I’m staying with the standard story size and removing the story title; I just don’t like it. I am then going to name this story point the name of our presentation since it will be the cover page. Once I am done, I will create a new story point by clicking the blank button on the top left.
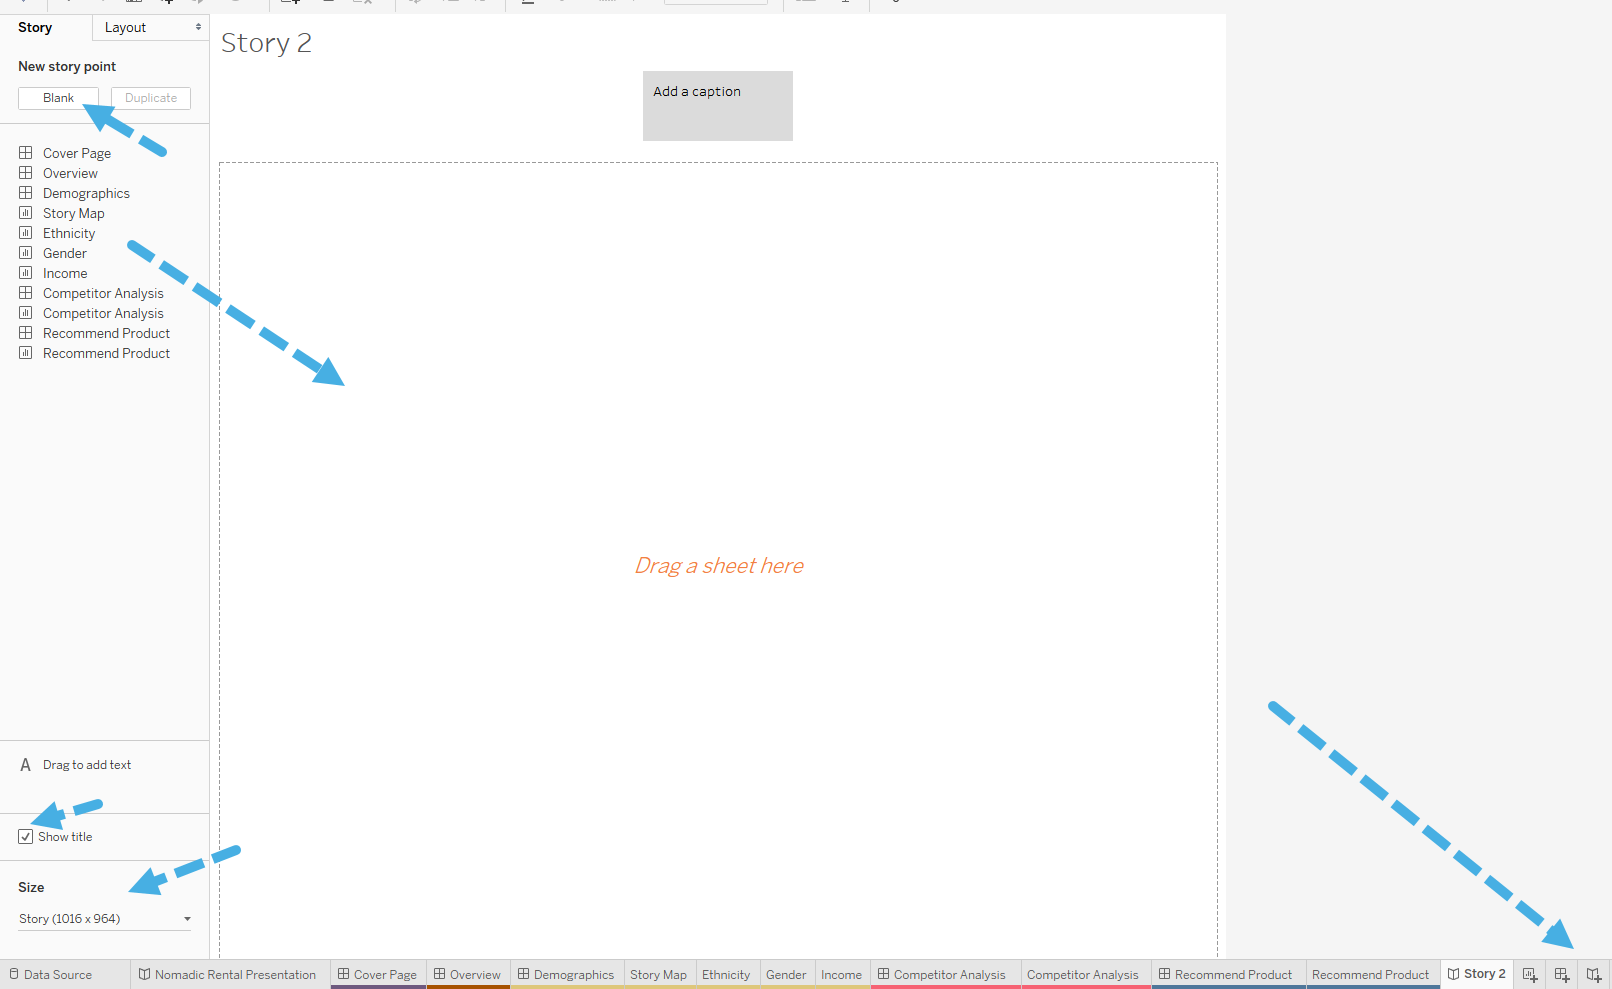
From here it is the same process, keep dragging your dashboards into the new story points till you are finished. You’ll probably want to format this a little bit so let’s go up to Story, then Format in the menu above. You can change the titles font color, the shading of the background and a few more things. You can also change the navigator to match your branding which to me is the most importing formatting piece. Now you can clean it up some, and you have your new professional Tableau presentation.

So really if it’s me, I wouldn’t even be doing PowerPoints presentations anymore if I am presenting data, I would be using a Tableau presentation like this. Use this Tableau story example to get you thinking about how you can use it in your company. I would put everything in a Tableau story and show that. You would really stand out presenting something like this. The last point, I want to make it, even though I made these nice graphics for my story you could also put a layout container there and change the background color of it. That works just as good. If you want this template, you can go ahead and download it using the link below. How you enjoyed these Tableau story tips, see you next time!
Download Free Story Template:
Download the workbook and data I used to create the blog so you can use it as a template.


There is definately a lot to find out about this subject. I like all the points you made